
 iPod 5 Screen Replacement Repair
In this tutorial I will guide you step by step on your iPod 5 Screen Replacement. You will learn how to replace your cracked and shattered iPod 5th generation screen and replace it with a brand new assembly. The Apple iPod Touch 5th gen has a 4 inch display. It is available in many different colors.
Need more detail? Check out iPod 5th Generation Replacement Parts Diagrams
As great as these portable MP3's are, Apple screens tend to get easily scratched or have their glass cracked on a regular occasion. One drop onto a concrete floor and you will be seeking some one to repair the cracked iPod screen. With my help, you will be able to replace the broken screen assembly without having to spend over $100 on a repair for your screen.
You will need the following materials for your repair:
How to replace Cracked screen on iPod Touch 5th Generation:
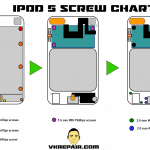
Before you begin, make sure you are doing the repair in a nicely lit room. Make sure it is free of dust. Have all your tools ready near you. I like to have a sheet that I work on in case broken glass shards come off the iPod. Lastly, you need to be able to label and keep track of the different screws so you know which one is which. Check out our free printout below that will help you organize the screws!
Step 1: Take the Screen Off the iPod
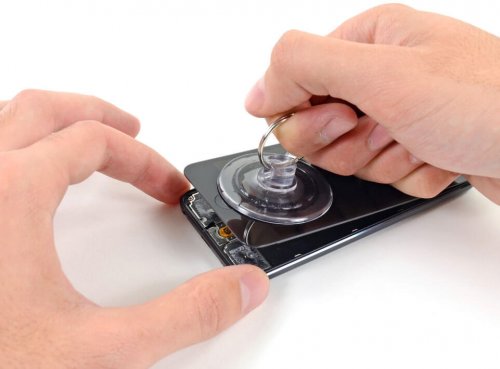
Photo by ifixit.com
You will need to either purchase a suction cup, or you may have one around you. Press the suction cup onto the iPod screen near the home button. Make sure its firmly onto the glass screen.
With one constant action, begin to pull the suction cup towards the opposite way until the iPod screen assembly begins to loosen from the adhesive. Do not pull it all the way out as there are cables attached to the iPod's body.
Having trouble because your iPod's screen is too cracked? Apply some tape over the screen in order to get some better suction. When doing the iPod 5 screen replacement, be careful not to cut yourself from any of the broken glass!
Step 2: Remove the Bezel
Use a plastic opener, or find something else that is suitable and won't leave a mark on the iPod. You now have to loosen the plastic bezel so it comes off. It is attached with clips so make sure you do not break them or you will need to buy a new plastic frame. Begin from the top and work your way down the body. Do this very slowly!


Video by repairsuniverse.com
Do the same for both sides. The plastic bezel frame should come off if you have unhooked all of the clips. Do not try to take the whole assembly off since it has its cables still attached.
Step 3: Remove the Screws
With the glass and LCD flat on the other side, you can begin working on the body of the iPod 5th gen. Using your plastic tool, peal the home button away from the metal plate. Do not remove it completely. Be gentle not to bend the ribbon.
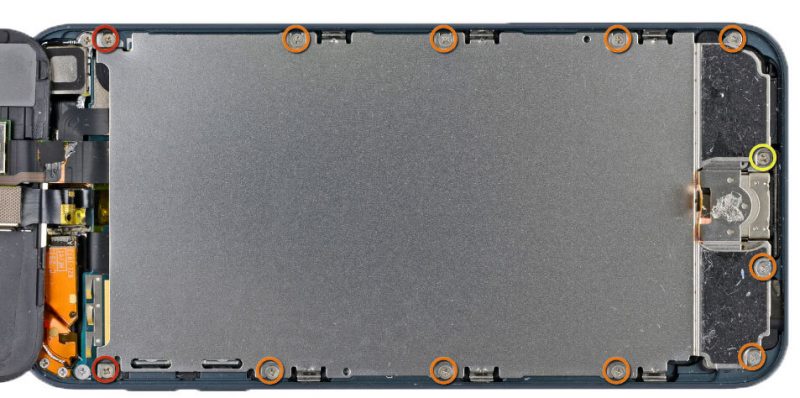
Photo by ifixit.com
You will now have to remove the circled screws using a Philips head screw driver. It is important that you don't mix these screws up! Tip: Use our print out!
With the screws removed, remove the metal plate off the rear case.
Step 4: Move the Battery
To get access to the ribbon connections, you must remove the motherboard screws. Remove the circled screws from the logic board.
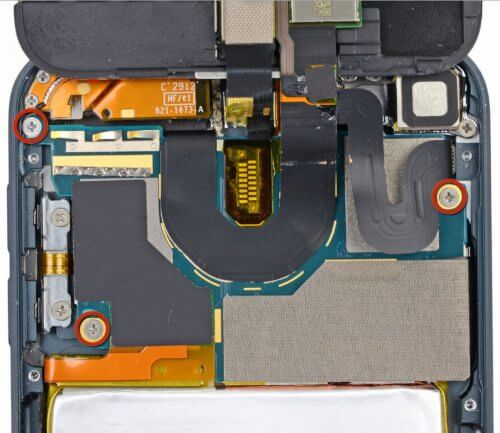
Photo by ifixit.com
With your tool or plastic opener, carefully begin to pry the battery off the adhesive glue it sits on. Do this very slowly and with care as you do not want to damage the battery on the iPod. Put the battery on its opposite side so the ribbon cable is straight. These ribbons are very sensitive, avoid as little movement as possible. When working on your iPod 5 screen replacement, being slow and gentle always wins!
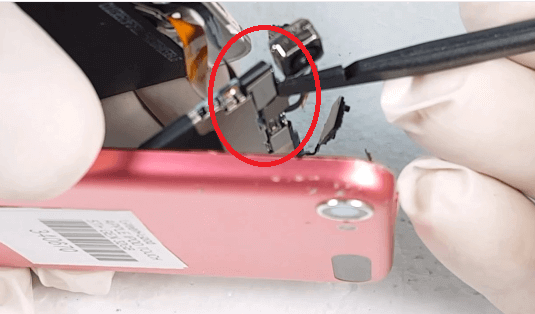
 Step 5: Front Facing Camera
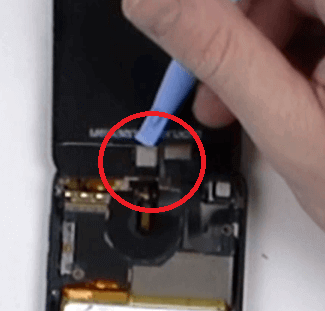
with a flat head tool, pry the front camera away from the screen assembly. You should not need to use a lot of force as it just sits in a notch.
Step 7: Remove the speaker
On the bottom of the iPod, there will be black tape covering the speaker, headphone jack, and light connector. Remove it with tweezers or your finger nails. Remove the circled screws.
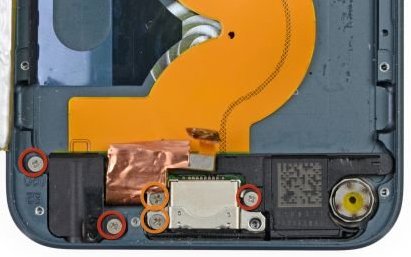
Photo via ifixit.com
Once the screws are removed, pry out the speaker from the rear case, but do not take it out as it is soldered to the logic board of the iPod. Hold the iPod 5th gen tight and slowly pull the large yellow ribbon cable out from the case.
Step 8: Disconnecting the digitizer
On order to get the screen off, you have to disconnect it from the motherboard. What makes this repair so time consuming is that the connection is located underneath the motherboard, so you have to take a lot of things off just to get to it. Gently flip the logic board over so you can see all the connections. You will want to unhook the digitizer from the logic board.
Step 9: Removing the LCD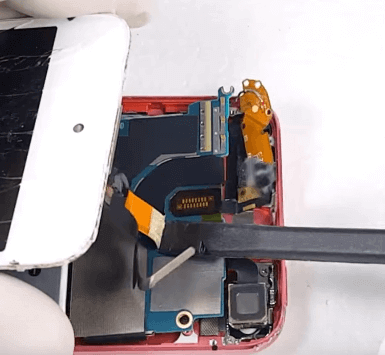
Flip the logic board back. It is time to loosen the display cable ribbon. It is glued onto the logic board. Use you plastic tool for this. Depending if you want to save the broken screen or not, go slow so you do not damage the ribbon. Finally, remove the display assembly from the rear case of the iPod. Follow the steps backwards to put your Apple iPod Touch 5th Generation back together.
Note: Depending on what iPod 5 screen replacement assembly you buy for your iPod touch 5th gen, it might come with a new plastic frame or home button. If it does not, you can take it off your cracked assembly.
